Try ZenCrepes self-hosted
This section of the documentation contains instructions to get started quickly with ZenCrepes self-hosted (see Introduction for more details) using docker and docker-compose. This doesn't aim at providing instructions to install a production-grade environment, but to take the shortest path to a running ZenCrepes environment.
This documentation has been tested on Mac, instructions should be identical on GNU/Linux.
Pre-requisites
The following elements are needed to follow this page:
- Docker and Docker-compose
- A publicly reachable host (for the Webhook configuration)
GitHub Configuration
Obtain a GitHub developer token
Log-in your profile in GitHub, and go to your settings.
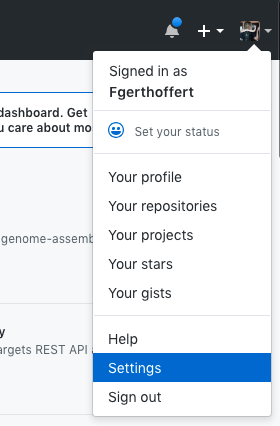
In the left-side menu, click on Developer settings at the bottom.
Then select Personal access tokens and Generate new token.
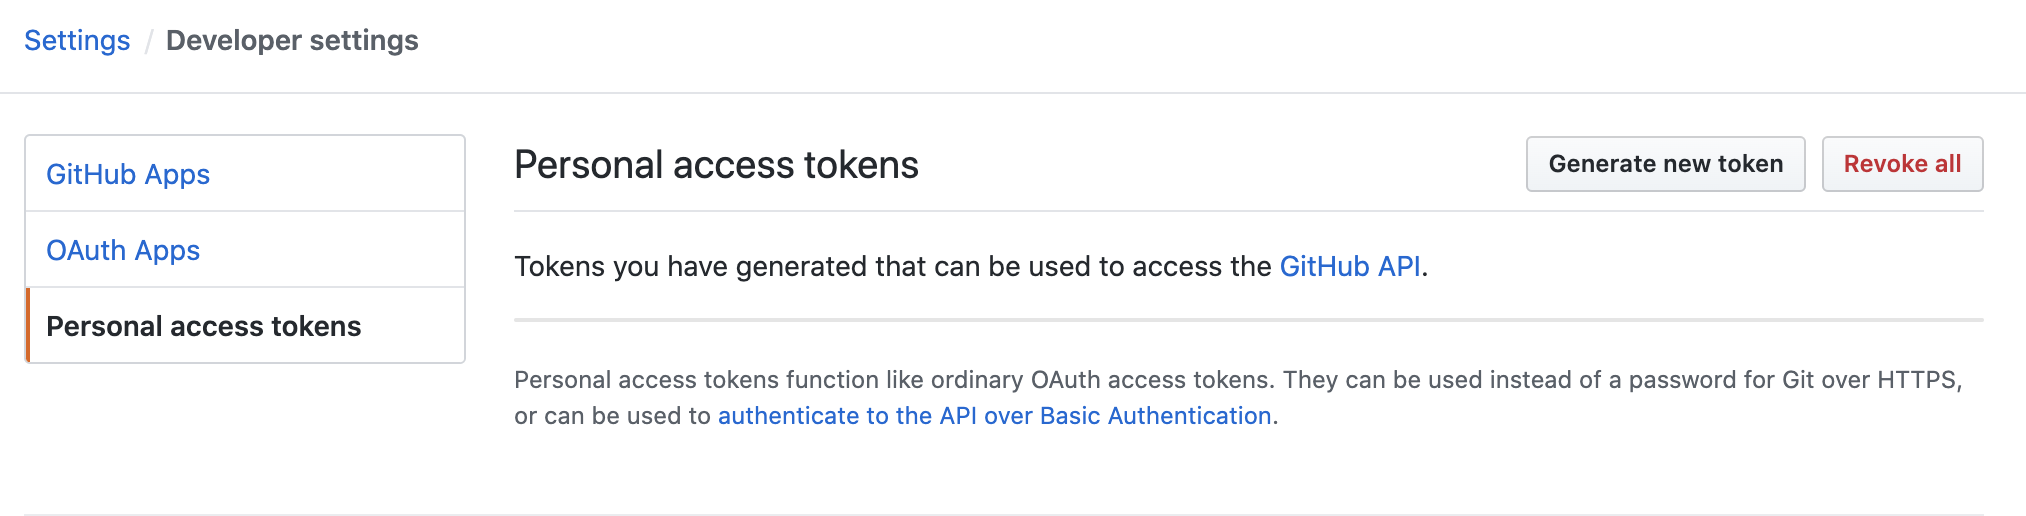
Give your token a name, and select the following scopes:
- repo
- admin:org
Those scopes should be sufficient to get started, click on Generate token and keep this token safe (don't share it!).
Register a WebHook
The next thing is you need to to register a WebHook, it will be used to receive events on your organization (or on individual repositories).
Go to your organization (or repo settings) and click on Webhooks
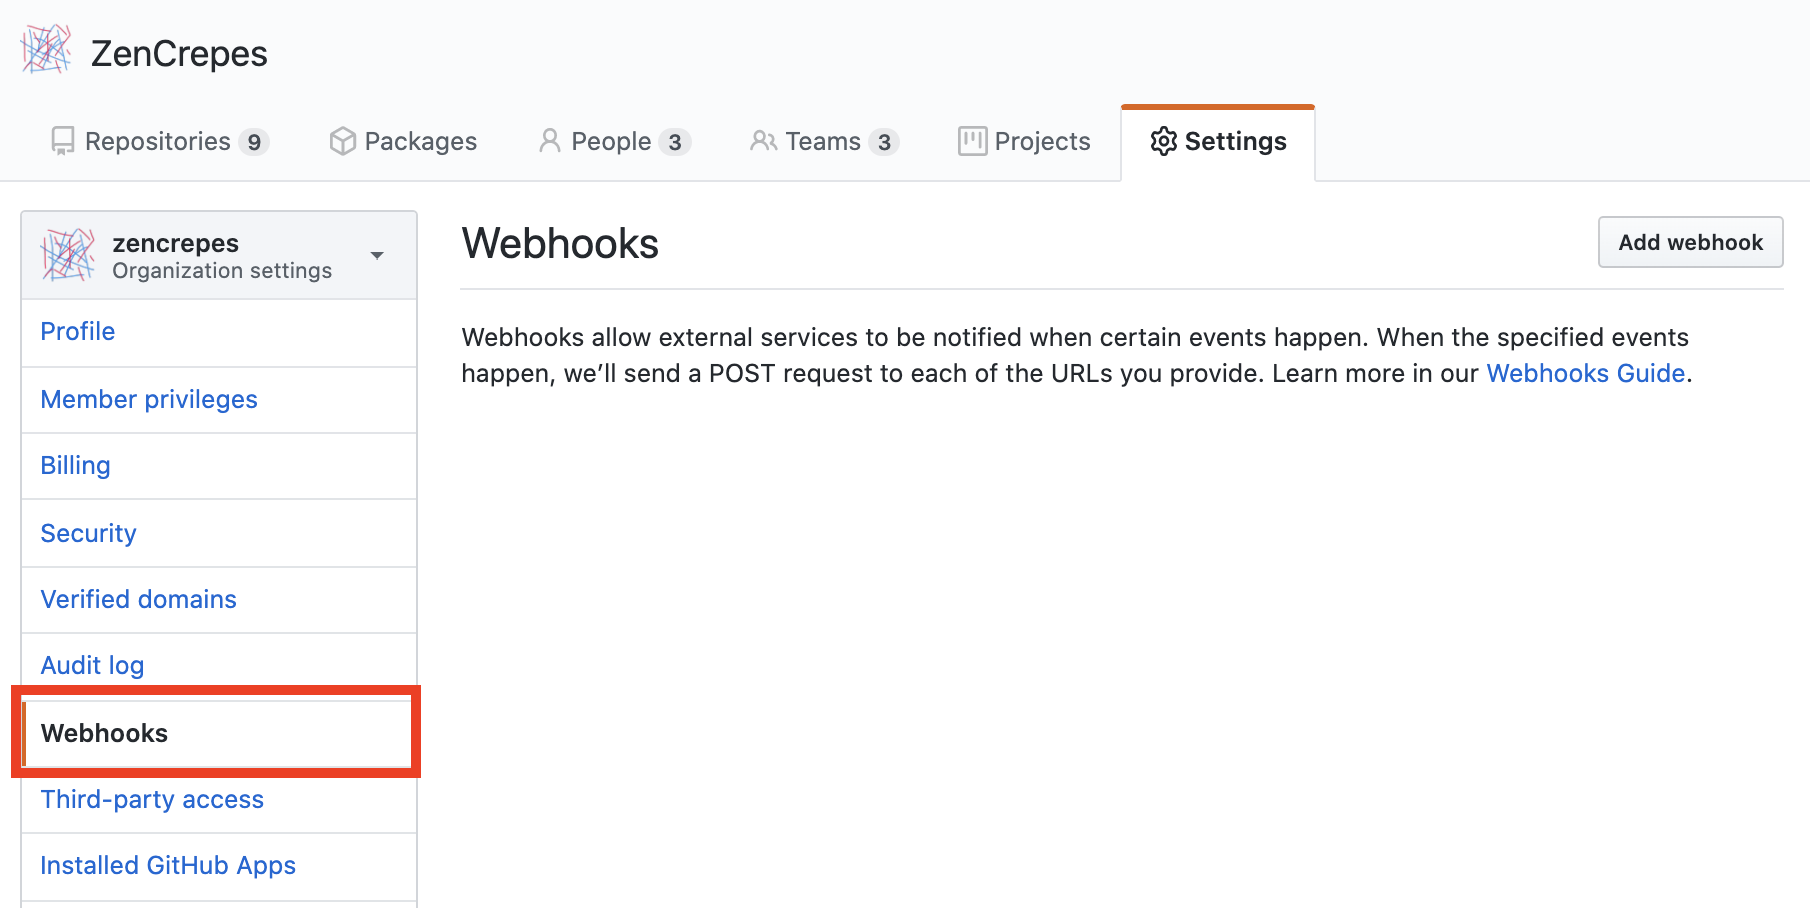
Then click on Add Webhook, and enter the following settings:
- Payload URL: The zqueue host that will be listening to the events, for simplicity's sake and in the context of this guide we're going to expose port 3003, on the assumption you do not configure SSL (don't do that for production), you'd just have to enter:
http://YOUR_DOMAIN_OR_IP:3003/github/webhook. - Content type: Select
application/json. - Secret: Enter a secret and keep it safe, it will be used by zqueue to verify incoming events.
- Which events...: Select the events you'd like to receive, you can select
Send me everythingfor the purpose of getting started quickly. - Active: Unselect this box until the environment is running (the last step of this guide).
Clone the docker repo
PS: /tmp/zencrepes-data is where the configuration file and cache data will be stored, if you whish to use a different directory, you'll need to update the docker-compose.yml file.
Configure ZenCrepes
The next thing you need to do is to configure ZenCrepes, a template configuration can be obtained easily by starting either zindexer, zapi or zqueue. At startup those tools will look for a configuration file, and if they can't find any, will generate a default one and terminate themselves.
You'll see an error message similar to the below and your container will stop.
A default configuration file (config.yml) is now located in /tmp/zencrepes-data. Note that the path defailed in the logs above (/root/zencrepes/config.yml) refers to the container's filesystem, so use your local mount point (/tmp/zencrepes-data/config.yml).
Configure ZenCrepes
Open-up /tmp/zencrepes-data/config.yml, and modify the following elements:
For the elasticsearch host, use http://zc_elasticsearch:9200 as this corresponds to the setup with docker-compose, same applies for redis. Leave all the other settings as-is.
Start the environment
Simply pull the latest version of all of the images and start the environment.
ZenCrepes is now available at http://localhost:3000 but hasn't been configured yet ! At that point you should be able to access it, but the left-side menu will be mostly empty.
Enable repositories
To facilite discovery (and limit dependencies to external tools), zindexer (which is a CLI tool) has been dockerized, and a small (hugly?) hack was done to ensure this process doesn't shut down after initial execution, keeping the Docker container alive. This will allow you to interact with the command tool without needing to have node and npm running on your machine.
The first step is to identify repositories to load data from (those are called sources in ZenCrepes).
Run the following command:
This gives view a quick view at the available commands, which ultimately define what data will be fetched.
To get started quickly, with as much data as possible, run the following command:
This will enable all repositories from all GitHub organizations affiliated with your account. But be careful, it could represent a lot of data !
Fetch data
ZenCrepes can fetch various different datasets from GitHub, you can get a list of the available datasets by running the following command
You can then fetch the data of your choice (or all of it) using the commands below:
Data is fetched per repository, once a repository has been fully loaded its data becomes available in ZenCrepes. So if you are fetching a lot of data, you don't need to wait until the end to start playing with the tool.
Important notes
Authentication/Authorization is not enabled, so pay attention to where you are spinning up this environment.
Don't run zindexer multiple times in parallel with the same token (or username for that matter). If you do that you will hit GitHub rate throttling. On top of that, it's in everyone best interest to play gently with GitHub API.
GitHub will issue 5000 tokens per 1-hour period, which should be plenty for most discovery situations. You can monitor token consumption while zindexer is running, by watching for the following messages:
ZenCrepes will pause data loading, until token reset, if you do consume all tokens.
If you re-run the command later on, zindexer will only fetch newly updated PRs.
On the long-run, zindexer will only be useful for the initial data fetching (historical data). another tool zqueue (not built yet), will take care of fetching data based on events it will receive from GitHub. zindexer is only needed to fetch data, it doesn't need to be running constantly.
That's it, happy discovery !
Using Keycloak
ZenCrepes can be configured to use Keycloak to provide an authorization layer, this is required if you want to use any of the features directly interacting with GitHub (for example bulk modifying labels).
To start the ZenCrepes docker environment with Keycloak enabled, simply run:
And follow configuration instructions available in the dedicated section on Authentication & Authorization, not running the container manually since it is provided by docker-compose-keycloak.yml.
Keycloak configuration is a bit peculiar as it needs to be reachable from both your webbrowser (for the redirection from GitHub) and directly from the API, through the KEYCLOAK_AUTH_SERVER_URL parameter.
And if those two are not using the same URL, you are going to see the following error {"message":"jwt issuer invalid. expected: http://zc_keycloak:8080/auth/realms/ZenCrepes"} when trying to access the API.
The easy solution for this is to edit your local /etc/hosts file, to create an alias for zc_keycloak.
Then edit your github OAuth configuration (which you did when following the Authz configuration above), replacing localhost with zc_keycloak in both Homepage URL and Authorization callback URL.
In production, Keycloak would be hosted properly and have its own URL, which will make this configuration tweak not needed.